Sure, I have this hobby of fixing cameras. I also get into all sorts of other things as well.
Tuesday, May 28, 2024
About the brakes
Jeep Patriot list goes on and where am I now?
Not so sturdy jack

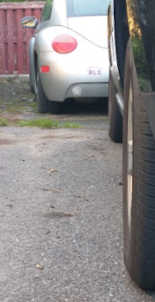
I picked this jack due to the description of it having a heavy duty cradle and when it arrived, it did feel heavy like the original jack, but compared side by side to an OE jack this was another story. The Chevy included OE jack was actually heavier although smaller looking.
The Chevy was fine in the end, only the crushed jack, a dent in the trim and a dent in the driveway from all of this.
Sunday, May 26, 2024
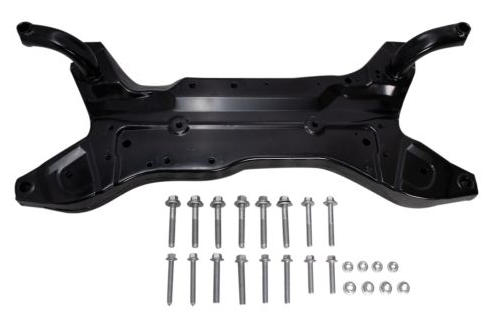
The truth is not if but when I'll need a new subframe (K frame)
Friday, May 24, 2024
Jeep Patriot Front-End Camber conundrum
One of the last things to solve is the, very noticeable, negative camber in the front. It was about two years ago that we had a professional mechanic look over our Patriot from a list of concerns and ended up performing a bearing replacement in the rear and front lower control arms replacement.
It was also requested he look over and let us know what else needs looking at down the line. He claimed nothing major, just the "rear links" needed looking into at some point.
Since then, we were flunked our inspection, front wheels brake performance was uneasy and the e-brake was also flunked.
Although, we did get those things corrected as under warranty. Since then, we've had very bad negative camber (bottom juts out) show us in the front and a pair of chewed up tires on there inside shoulders that had less than 800 miles on them.
 |
| It is hard to see, but it is 2 degrees off |
Things to look at in hopes of solving this on my own:
- see if new front lower control arms have prematurely failed
- Strut failure
- Pre-Load was set when not required for our type of suspension
- Subframe rot, although not likely as no other issues were noted
Other bits:
Looking to replace with Moog Front Lowers and Sway-Bar Links (needed is center to center length)
From research that I've conducted. The MK or Patriot has no normal camber provisions available. Aftermarket camber bolt can be added in a case were part that or not OE type are used and put the factory specs off.
I hope that some OE struts might solve this as the originals don't look good at all and after nine years of service, it is a good bet they are due.
Tuesday, May 14, 2024
Chevy Malibu's first flush...boy did it need one
There are funny stories of nuns and used cars...or otherwise the well known little old lady from Pasadena?
I think I'm right in saying that that vehicle has not gotten a transmission fluid change all in its 80k miles and although the previous owner was not a lead foot, it is clear that some neglection of proper maintenance was not considered.
I drained out the first four quarts. A sort of brown charcoal colored liquid came out. It is safe to say the viscosity was very low, literally like water spilling out the drain.
I don't have time to fumble about to do the set up for a proper full flush, so it is going to be a series of partial exchanges.
4 quarts out and 4 quarts in. It is listed for 9.5 quarts and exchange method is not the best method, but it is easier.
If we drive it around for a bit and do another 4 quarts, it would be about a 50% change. Maybe later in the fall I'll do it again for a 75% total or do the full flush?
I studied up on the method that involves the disconnecting of the output line transmission cooler and running the car to allow the tranny to pump into a bucket... roughly the following...
- locate drain and check bolt
- Start by emptying what is in the drain pan
- Add about 4 quarts
- Hook up the lose to out going line
- Run engine until you see the color go red from the 4 quarts added earlier
- Stop the engine
- Fill up until to first trickle comes out of the check port
- Run transmission shifter from N-D-R and back until operating temp
- Check progress of check port
- If it is a slow trickle, then all is good or if it has stopped, add a little more or if it is gushing, keep draining.
We will see, but for now the 4 quarts will help out. I hope to do that sort of flush that requires my detaching the transmission line as it would be more complete.
Monday, May 13, 2024
Jeep Patriot Rear Suspension sag - confirmed...it does effect the camber.
This sort of question does not tend have much mentioned in repair manuals or is it a popular subject. It may be obvious to most car folks, but I'm not a professional mechanic nor do I play one on TV.
So, after much struggling with the tight spaces as well as shoulder strain, the upper and lower control arms are installed.
Rear struts were seemingly fine and will not be replaced... for now.
The lesson was... Youtubers videos never cover all the pitfalls to this particular repair. Nor do they note that one side was much more harder than the other. That being the driver's side.
Another thing I found was that if I had chased all the bolt threads prior to attempting to remove them, it might have been easier. This is due to the rust build up.
9 years of built up rust obstructs the nut's threads. In three of four cases the nut would have come off easily from its torqued positions, but to then only stop turning after a few spins.
Penetrating oil was not enough to remove the nut further along as each turn pushed the rusty grime until the collected debris clogged the nut.
I didn't learn my lesson until the driver's side and took time to aggressively wire brushed the threads prior to wrenching.
After the installation was complete, it was a night and day change in the camber of the rear wheels.
Now the only things left are the links to the trailing arm as well as the trailing arm bushings.
That was all for another day.
Tuesday, May 7, 2024
Repair schedule for the Jeep Patriot (MK) in no particular order
- Rear Lower control arms and links - done
- Full Inspection of Rear Sub Frame
- Front links
- Full inspection of Front Sub Frame
- Struts - All
- Brakes - All Pads
- Brakes - All Rotors
- Full Brake System flush
- Alignment-?
- Transmission Fluid\Full or Partial Flush
- Shampoo Interior
- New Tires or just bald pair due to alignment issues
- Rust Conversion experiments
Monday, May 6, 2024
Quick note about louvers in filters
Just spun off the old ModilOne filter which is a louvered core design and all the louvers were clearly defined. Not one flat or closed looking one amongst them. The WIX XP filter was not as fully opened with about 20% not properly formed, but that is much better than the regular WIX with more than 70% in questionable condition and the remainder not exceeding 0.4mm opened. I've tried to pry some open, but I was possibly creating metal shards. Well.,.. end of note.
Friday, May 3, 2024
Getting into Wix filters too late... not as good anymore?
While dealing with the next pending car chores, I thought I would give WIX a try and took Amzoil up on one of those oil change kits. However, as you can see, this might not work out. I'm not sure if this is normal? Some of the so called holes or slits are not all the way open.
Above is a store purchased WIX XP filter and most louvers look ok.
The filter sent to me by Amsoil with the oil change kit a #57060 filter. Does not look as wide open as the store purchased WIX XP and many seemed not opened at all along the top and bottom of the filter core. I dangled a tiny mirror to see the louvers facing the other direction and it was about the same number not fully opened. This looks wrong right?
The louvers look like thin knife cuts and I counted around 23 columns by 8 pairs of holes average for my model filter and comes to 368.
The slits seem to average to 0.4mm wide and a length of 2.2mm, that would give a respectable 32 sq. mm of openings. The thinnest are less than 0.1mm and my method to measure is a plastic feeler I made and check with a micrometer.
It could be fair to say that it roughly measures to about 11-12 square millimeters total of oil passage space or the size of a two pencil sized holes and that means more than 2/3rds holes are under sized? The store purchased one would calculate to about 40-54 square millimeters. The inlet holes might be about 18-22 square millimeters. My general logic is that it should at least be slightly bigger than the inlet?


